Building a 3D Shadow Box
There is a distinct satisfaction in handing someone a gift that feels like it was pulled from the pages of a magazine or, better yet, crafted with intention and care. While store-bought items have their place, they often lack the personal resonance that comes from creation. This is where Building a 3D Shadow Box becomes more than just a craft project; it transforms into a meaningful gesture for friends and family alike. These layered displays are simple to execute but deliver an impact far greater than their modest material cost. Whether you are looking to commemorate a wedding, celebrate a graduation, or simply display a collection of cherished mementos, the process offers a unique blend of artistic expression and technical precision.
The appeal lies in the versatility. You are not limited to a single aesthetic. The styles available range from minimalist geometric arrangements to lush, floral-heavy compositions. However, the ease of the final product can sometimes mask the importance of the preparatory steps. Many enthusiasts rush into cutting cardstock without considering scale or structural integrity, leading to frustration when the layers do not align as envisioned. To ensure your shadow box is a success, it is vital to approach the construction methodically, paying close attention to sizing, material selection, and assembly techniques.
Understanding the Scale and Structure
One of the most common pitfalls in this craft is underestimating the relationship between the design size and the physical dimensions of the box. A shadow box relies on depth to create its three-dimensional effect. If your design elements are too large relative to the frame’s interior, the layers will crowd each other, eliminating the sense of space and perspective that makes the piece compelling. Conversely, if the elements are too small, the composition may feel sparse and unbalanced.
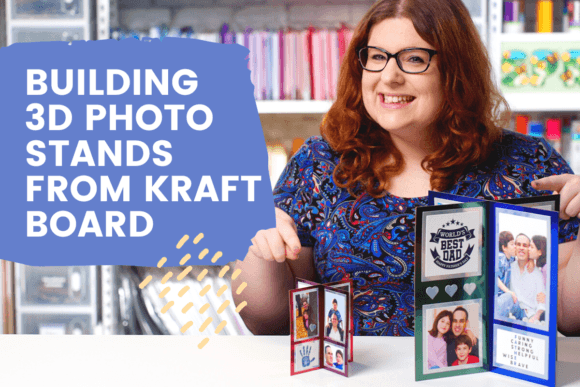
Talented crafter Corinne Blackstone emphasizes the importance of sizing your design correctly before making a single cut. This begins with understanding the inner dimensions of your chosen box. Standard shadow boxes vary significantly in depth, typically ranging from one inch to several inches. The deeper the box, the more layers you can incorporate, allowing for a richer visual narrative. When planning your layout, always measure twice. It is easy to assume that a digital template will fit perfectly, but paper stock thickness and adhesive bulk can alter the final fit. By accounting for these variables early, you avoid the disappointment of having to trim finished pieces to make them fit.
Selecting Materials That Last
The longevity of your shadow box depends heavily on the materials you choose. Cardstock is the standard medium for these projects due to its rigidity and ability to hold crisp cuts. However, not all cardstocks are created equal. Thinner papers may warp over time, especially if exposed to humidity, while overly thick boards can be difficult to layer smoothly without bulky adhesives that push the layers too close together.
When evaluating your options, consider the weight and texture of the paper. A higher GSM (grams per square meter) rating generally indicates a sturdier sheet that will maintain its shape. Additionally, think about how light interacts with your materials. Matte finishes absorb light and provide a soft, elegant look, whereas glossy stocks can reflect light and create unwanted glare, particularly if the box is displayed near a window or lamp. For a professional finish, stick to high-quality cardstock that complements the theme of your design. Avoid using recycled or rough-textured papers unless they serve a specific stylistic purpose, as they can obscure fine details and make cutting more challenging.
The Role of Templates and Digital Tools
For those new to the craft, relying on pre-made templates is a wise decision. These resources provide a reliable foundation, ensuring that your proportions are correct from the start. Downloading a shadow box template allows you to experiment with layouts digitally before committing to physical materials. This step is crucial for correcting errors that would otherwise result in wasted paper and glue. Digital previews help you visualize how different colors and shapes interact, giving you confidence in your final arrangement.
However, a template is only as good as the execution. Ensure that you download files compatible with your cutting machine or printer. If you are hand-cutting, verify that the print quality is sharp enough to follow the lines accurately. Blurry lines lead to jagged edges, which detract from the clean, polished look that defines high-quality shadow art. Taking the time to prepare your workspace and tools—such as using a fresh blade for cutting machines—will significantly improve the precision of your cuts.
Assembly Techniques for a Professional Finish
Assembling a 3D shadow box requires patience and a steady hand. The order of operations matters. Typically, you should assemble the deepest layer first and work your way forward. This ensures that each subsequent layer has adequate clearance and does not obstruct the view of the background elements. Using spacers, such as foam tape or small strips of cardboard, is essential for maintaining consistent gaps between layers. Without spacers, the layers may collapse inward, flattening the intended depth and reducing the dramatic effect of the piece.
Adhesive choice is another critical factor. Liquid glues can warp thin cardstock if applied too liberally. Instead, consider using double-sided foam tape or specialized craft adhesives that bond quickly and securely without causing distortion. Apply adhesive sparingly and press firmly to ensure a strong hold. Rushing this step often results in layers shifting out of alignment, requiring you to disassemble and restart parts of your project. Working in a well-lit area also helps, as it allows you to see shadows and alignment issues more clearly.
Evaluating Your Final Product
Before declaring your shadow box complete, take a moment to evaluate it from multiple angles. Look for any uneven edges, loose layers, or visible adhesive spots. Check that the backing is secure and that the glass or acrylic front is free of fingerprints and smudges. A professional presentation includes attention to these small details. If the box will be hung on a wall, ensure that the hanging hardware is appropriate for the weight of the assembled piece. An improperly secured frame can fall and cause damage, turning a thoughtful gift into a hazardous accident.
Furthermore, consider the lighting in the space where the shadow box will be displayed. Natural light can enhance colors but may fade certain papers over time. Artificial lighting should be positioned to minimize reflections and highlight the depth of the layers. By thoughtfully placing your creation, you maximize its visual impact and ensure that the effort put into building it is fully appreciated by the recipient.
Why This Approach Works
By focusing on precise sizing, quality materials, and careful assembly, you transform a simple hobby into a skill that yields impressive results. The process of Building a 3D Shadow Box teaches valuable lessons in spatial awareness and design composition. It encourages mindfulness and attention to detail, qualities that translate well beyond the crafting table. Whether you are creating a gift for a loved one or a decorative piece for your own home, the satisfaction of knowing you built something beautiful from scratch is unmatched. With the right guidance and a willingness to learn from common mistakes, anyone can master this rewarding craft.