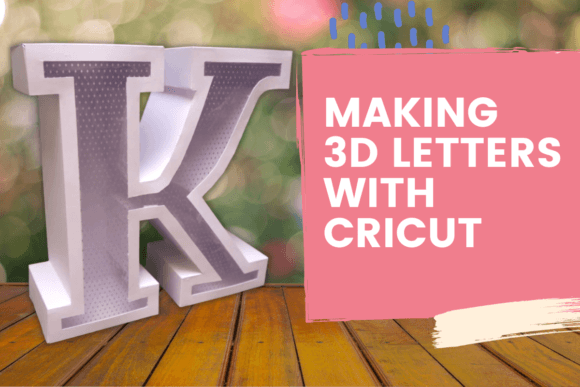
Making 3D Letters with Your Cricut: A Practical Guide to Dimensional Typography
The intersection of digital design and physical fabrication has never been more accessible than it is today. For creators, small business owners, and serious hobbyists, the ability to produce high-quality custom signage or decorative elements without industrial machinery is a significant competitive advantage. One of the most popular applications of this technology is Making 3D Letters with Your Cricut. This process transforms simple vector files into tangible, multi-layered objects that add depth and professionalism to any project.
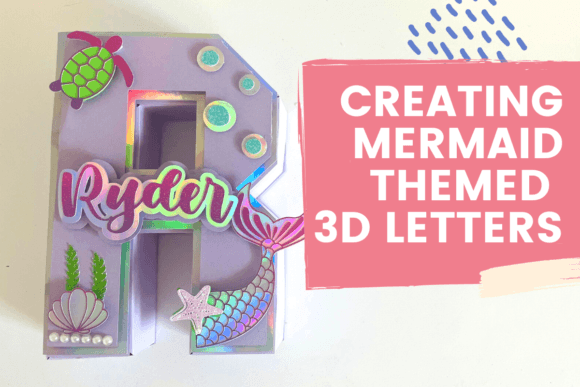
While the concept sounds complex, the reality is that Making 3D Letters with Your Cricut is surprisingly straightforward when approached with the right technique. As demonstrated by experts like Kelly from Let’s Get Clacking, the workflow involves precise cutting, strategic layering, and careful assembly. The result is not merely a flat sticker but a substantial object that commands attention. Whether you are looking to create personalized party decorations, enhance a child’s bedroom aesthetic, or produce unique gifts for clients, understanding the mechanics behind dimensional lettering is a valuable skill in the modern maker’s toolkit.
Understanding the Core Concept and Workflow
At its foundation, Making 3D Letters with Your Cricut relies on the principle of z-axis layering. Unlike traditional vinyl decals which exist on a single plane, 3D letters utilize multiple layers of material stacked upon one another to create height. Each layer corresponds to a specific segment of the letterform, typically increasing in size as they move toward the outer edge. This creates a stepped effect that mimics the look of carved wood or molded plastic.
The process generally follows these logical steps:
- Vector Preparation: You begin with a clean SVG file. It is crucial that the file contains separate paths for each layer. If the layers are grouped incorrectly or merged, the cutting machine will not be able to distinguish between them, resulting in a single flat cut rather than a stackable structure.
- Material Selection: The choice of material dictates the final durability and appearance. Cardstock offers an affordable entry point for prototyping, while foam sheets provide lightweight volume. For outdoor or high-traffic items, corrugated plastic or even thin plywood (with appropriate blade adjustments) may be necessary.
- Cutting and Weeding: Using the Cricut Maker or Explore series, each layer is cut individually. The weeding process—removing excess material—must be meticulous. Any stray bits left attached can prevent the layers from sitting flush against one another, ruining the geometric integrity of the letter.
- Assembly: This is where precision matters most. Adhesive spray or strong craft glue is used to align the layers perfectly. Misalignment here leads to wobbly structures or visible gaps that detract from the professional finish.
When executed correctly, Making 3D Letters with Your Cricut yields results that rival mass-produced items. The key lies in consistency during the alignment phase. Professionals often use registration marks or temporary positioning tapes to ensure that every subsequent layer sits exactly on top of the previous one.
Evaluating Materials and Tools for Optimal Results
The success of your project depends heavily on the materials you choose. Not all substrates behave identically under the pressure of a rotary blade or fine-point blade. When discussing Making 3D Letters with Your Cricut, it is important to consider how different materials affect weight, cost, and visual impact.
- Cardstock: Ideal for indoor decor and paper crafts. It cuts cleanly and holds adhesive well. However, it lacks structural rigidity, meaning larger letters may bow or warp if not backed properly.
- EVA Foam Sheets: These are lightweight and easy to cut, making them excellent for children’s room decor. They offer good cushioning and safety but can compress over time if handled roughly.
- Corrugated Plastic (Coroplast): This is the gold standard for durable signage. It is weather-resistant and rigid. However, cutting coroplast requires a deeper cut setting and can generate more static, which complicates the weeding process.
- Vinyl and HTV: While primarily used for flat applications, thick vinyl can be layered to create shallow depth. This is less about true 3D structure and more about textural contrast.
For those engaged in Making 3D Letters with Your Cricut for commercial purposes, investing in a cutting mat with strong grip capabilities is essential. Thin materials tend to shift during the cut, leading to misaligned layers. Additionally, using a brayer to smooth out your material before loading it into the machine ensures consistent pressure across the entire surface area.
Practical Applications and Market Value
Why do professionals and hobbyists alike gravitate toward Making 3D Letters with Your Cricut? The answer lies in versatility and perceived value. A flat printed sign feels cheap; a 3D constructed letter feels bespoke. This distinction allows creators to charge premium prices for what is essentially a low-cost raw material input.
Party Decorations: Themed parties often require specific typography that matches a color palette. Instead of buying generic banners, creators can produce custom name signs or age markers that coordinate perfectly with other decor elements. The tactile nature of 3D letters adds a sophisticated touch to events ranging from birthdays to weddings.
Home Decor and Nursery Items: Parents frequently seek personalized touches for their children’s spaces. Initials mounted on walls, name plaques above beds, or motivational words in playrooms are highly sought-after items. Making 3D Letters with Your Cricut allows educators and parents to create safe, non-toxic, and visually stimulating environments that support early literacy and personal identity.
Gifts and Merchandise: Personalized gifts carry emotional weight. A wooden-style 3D letter set spelling out a family name or a pet’s name serves as a lasting memento. Small business owners can leverage this technique to create branded merchandise, such as logo displays for desks or promotional stands for pop-up shops.
Challenges and Limitations to Consider
No creative process is without its hurdles. When evaluating Making 3D Letters with Your Cricut, it is vital to acknowledge potential pitfalls so you can plan accordingly.
Time Consumption: Layering increases production time significantly compared to single-cut projects. Cutting ten layers for a single letter, weeding each one, and gluing them together takes considerably longer than printing a decal. For high-volume orders, this labor intensity must be factored into pricing and scheduling.
Structural Integrity: Tall, narrow letters can become top-heavy. Without proper backing or a wide base, 3D letters may tip over easily. Designers must account for the center of gravity, especially when creating letters like "I" or "L". Adding a mounting bracket or a flat back panel can mitigate this issue.
Dust and Debris: The weeding process generates small scraps of material that can stick to adhesive surfaces. If not cleaned thoroughly before assembly, these particles can create bumps between layers, affecting the smoothness of the final product. A lint roller or compressed air can help maintain cleanliness during the assembly phase.
Who Benefits Most from This Skill Set?
Making 3D Letters with Your Cricut is particularly beneficial for:
- Small Business Owners: Those offering custom signage, wedding invitations, or event planning services can expand their offerings by adding dimensional typography to their portfolio.
- Educators: Teachers who want to create engaging classroom displays or personalized learning aids can produce durable, colorful letters that withstand daily use.
- Hobbyist Creators: Individuals who enjoy crafting as a stress-relief activity find satisfaction in the meditative process of cutting, weeding, and assembling intricate designs.
- Marketers and Branders: Brands seeking unique unboxing experiences or retail display solutions can use 3D letters to create memorable brand touchpoints.
In conclusion, Making 3D Letters with Your Cricut is more than just a fun craft; it is a practical skill that bridges the gap between digital design and physical reality. By mastering the techniques of layering, material selection, and precise assembly, you can produce high-quality, professional-grade items that serve both decorative and functional purposes. Whether you are decorating a child’s room, preparing for a special event, or growing a side hustle, the ability to create three-dimensional typography opens up a world of creative possibilities. With patience and practice, the results are not only achievable but deeply rewarding.