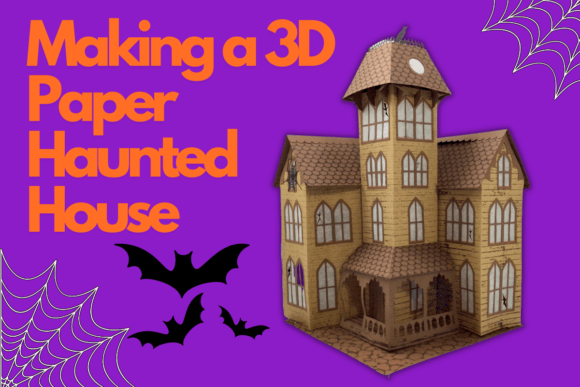
Making a 3D Paper Haunted House: A Practical Guide to Seasonal Crafting
Creating immersive seasonal decor does not always require expensive materials or complex machinery. For many creators, educators, and hobbyists, the intersection of digital design and physical crafting offers a unique opportunity to produce high-quality results with minimal overhead. One such project that has gained traction for its balance of visual impact and manageable complexity is Making a 3D Paper Haunted House. This specific workflow, often guided by instructors like Kelsey, utilizes SVG templates from platforms like Creative Fabrica to transform flat sheets into three-dimensional structures. The result is a detailed, spooky centerpiece that serves both as a decorative item and a functional learning tool for digital cutting software.
The appeal of this project lies in its accessibility. Unlike traditional woodworking or resin casting, which demand significant space, safety precautions, and financial investment, paper crafting relies on tools that are already present in many home offices and craft rooms. By leveraging vector-based designs, users can achieve precision cuts that would be difficult to replicate by hand. This guide examines the practical aspects of building a 3D paper haunted house, evaluating its suitability for various audiences and workflows.
Understanding the Workflow and Tools
At the core of Making a 3D Paper Haunted House is the use of Scalable Vector Graphics (SVG) files. These digital blueprints contain the mathematical instructions necessary for electronic cutting machines, such as those produced by Cricut or Silhouette, to trace and cut intricate shapes from cardstock or heavy paper. The process begins with downloading a reliable template. Quality varies significantly among free and paid resources, so selecting a well-structured file is crucial for a successful build.
Once the template is acquired, the next step involves preparing the design within Cricut Design Space. This software acts as the bridge between the digital file and the physical machine. Users must learn how to arrange the pieces efficiently on the virtual mat to minimize waste and streamline the cutting process. This stage requires attention to detail, particularly when dealing with small components like window frames, roof shingles, or decorative gargoyles. Proper setup ensures that the machine operates smoothly and that no delicate parts are lost during the cutting phase.
- Template Selection: Choose an SVG file that includes clear score lines and fold indicators. Complex 3D models often have dozens of interlocking pieces; a well-designed template will group these logically.
- Software Configuration: Familiarize yourself with Cricut Design Space’s layering system. Understanding how to weld or union shapes can prevent errors where separate lines might be cut incorrectly.
- Material Choice: Standard printer paper is insufficient for structural integrity. Heavyweight cardstock, typically between 65lb and 80lb, provides the necessary rigidity while remaining easy to fold and glue.
Evaluating Quality and Structural Integrity
One of the primary concerns when engaging in Making a 3D Paper Haunted House projects is durability. Paper is inherently fragile, susceptible to tearing, warping from humidity, and damage from handling. However, with proper technique, these structures can be surprisingly robust. The strength of the final product depends largely on the quality of the adhesive used and the precision of the folds.
Professional builders often recommend using a fine-tip applicator for glue, allowing for controlled application along the tabs provided in the SVG design. Excess glue can seep through porous paper, causing discoloration and weakening the bond. Additionally, scoring the fold lines before cutting—or reinforcing them after—ensures clean, sharp angles rather than ragged bends. This attention to structural detail elevates the project from a simple child’s craft to a sophisticated display piece suitable for professional settings or competitive exhibitions.
The aesthetic outcome is also influenced by the lighting integrated into the design. Many haunted house templates include slots for LED tea lights or fiber optic strands. When assembled correctly, these elements create depth and atmosphere, transforming the paper structure into a dynamic light installation. This feature adds significant value, making the project appealing not just for Halloween but for year-round interior design enthusiasts who appreciate gothic or macabre aesthetics.
Practical Applications and Audience Fit
The versatility of Making a 3D Paper Haunted House makes it relevant to a diverse range of professionals and hobbyists. For educators, this project serves as an excellent interdisciplinary tool. It combines geometry, spatial reasoning, and fine motor skills, offering a tangible application of abstract concepts. Teachers can use the assembly process to demonstrate principles of engineering and design thinking, guiding students through problem-solving scenarios as they navigate tricky joints or misaligned pieces.
For content creators and bloggers, the project offers rich visual material. The step-by-step nature of the build lends itself well to video tutorials, blog posts, and social media campaigns. The dramatic transformation from flat sheets to a three-dimensional scene provides compelling before-and-after imagery that engages audiences. Furthermore, affiliate marketing opportunities exist around the recommended tools, such as specific glues, cutting mats, and the SVG templates themselves, creating potential revenue streams for serious creators.
Small business owners and entrepreneurs in the handmade market may find value in scaling this concept. While individual houses are time-intensive to produce, mastering the workflow allows for efficient batch production. Customization options, such as changing color schemes or adding personalized signage, can increase perceived value. However, pricing must account for the labor involved, ensuring that the final retail price reflects the skill and time invested.
Potential Limitations and Considerations
Despite its advantages, there are limitations to consider when undertaking Making a 3D Paper Haunted House. The most significant constraint is environmental sensitivity. Paper reacts to moisture and temperature changes, which can cause warping or mold growth in humid climates. Displaying the finished house in areas with high foot traffic increases the risk of accidental damage. Therefore, protective measures such as acrylic covers or careful placement away from walkways are advisable.
Another consideration is the learning curve associated with electronic cutting machines. While user-friendly, software like Cricut Design Space can be overwhelming for beginners. Navigating menus, understanding material settings, and troubleshooting machine errors require patience and practice. Those expecting immediate perfection may become frustrated. It is essential to approach the process with a mindset of experimentation and iteration.
Additionally, the availability of high-quality templates is not uniform. Some online sources offer poorly constructed files with missing layers or incorrect proportions. Investing in reputable sources, such as Creative Fabrica, reduces the risk of encountering technical issues. Reading reviews and examining previews before purchase can save considerable time and frustration during the assembly phase.
Conclusion and Final Recommendations
In summary, Making a 3D Paper Haunted House represents a compelling blend of creativity, technology, and craftsmanship. It offers a rewarding challenge for those willing to invest time in learning new skills and refining their techniques. The project’s strength lies in its ability to produce visually striking results using accessible materials and widely available tools.
For individuals looking to enhance their seasonal decor, develop new crafting skills, or create engaging content, this project delivers substantial value. By focusing on precise preparation, quality materials, and careful assembly, builders can overcome common pitfalls and achieve professional-grade outcomes. Whether used for personal enjoyment, educational purposes, or commercial ventures, the 3D paper haunted house stands as a testament to the enduring appeal of hands-on creation in a digital age.
To maximize success, start with a well-reviewed template, invest in appropriate cardstock, and take your time with the assembly process. Embrace the iterative nature of the craft, and do not hesitate to experiment with lighting and finishing touches. With dedication and attention to detail, you can bring a spooky, three-dimensional vision to life that impresses friends, family, and clients alike.