The Art of the Trinket Tray: Mastering 3D Resin Flowers with Tess Lark
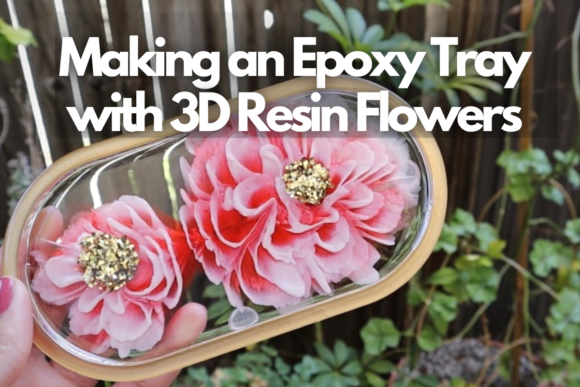
There is something inherently satisfying about watching liquid resin transform into a solid, glass-like surface. It is a process that blends chemistry with creativity, offering a tangible result that feels both modern and timeless. Among the myriad of projects resin artists tackle, making an epoxy tray with 3D resin flowers stands out as a particularly rewarding endeavor. It is not just about creating a container for your jewelry; it is about capturing a moment of botanical beauty in permanent suspension.
In this guide, we will explore the techniques detailed by expert instructor Tess Lark, who walks students through the nuanced process of crafting these stunning trays. From selecting the right molds to mastering the application of glitter, alcohol ink, and mica powder, this article serves as a comprehensive resource for anyone looking to add this versatile skill to their artistic arsenal.
Why Choose the Epoxy Tray Format?
Before diving into the "how," it is worth understanding the "why." The trinket tray is one of the most practical applications of resin art. Unlike wall hangings or large sculptures, a tray is functional. It sits on a vanity, a desk, or a bedside table, serving as a daily reminder of the artist’s work. This functionality drives its popularity in the maker community and the gift-giving market alike.
Furthermore, the flat, shallow nature of a tray mold makes it an ideal learning ground for beginners while still offering enough depth for advanced artists to experiment with layering. When you combine this format with 3D resin flowers, you elevate a simple dish into a piece of wearable art. The three-dimensional aspect adds texture and visual interest, breaking up the monotony of a flat surface and inviting the viewer to look closer.
Gathering Your Arsenal: Materials and Tools
To successfully create a tray featuring 3D floral elements, preparation is key. Tess Lark emphasizes that having the right materials at hand can mean the difference between a bubbly, uneven finish and a crystal-clear masterpiece. Here is what you need to get started:
- Resin Mold: Silicone trays are essential. Look for high-quality, food-grade silicone that releases easily. Common shapes include circles, ovals, and organic leaf patterns.
- Epoxy Resin: A clear, slow-curing resin is often preferred for trays because it gives you more working time to arrange your flowers and remove bubbles.
- 3D Resin Flowers: These can be purchased pre-made or created separately using small round molds. Ensure they are fully cured before embedding them.
- Colorants: To achieve the vibrant effects seen in professional tutorials, you will need mica powder for pearlescent shimmer, alcohol ink for fluid, watercolor-like washes, and fine glitter for sparkle.
- Mixing Supplies: Precision scales, silicone mixing cups, wooden stir sticks, and heat guns or torches for bubble removal.
One critical consideration when choosing your flowers is their size relative to the tray. If the flowers are too large, they may protrude excessively, making the tray unstable. If they are too small, they might get lost in the resin swirl. Finding that balance is part of the creative process.
The Technique: Layering and Embedding
The core challenge in making an epoxy tray with 3D resin flowers lies in the embedding process. You cannot simply pour resin over the flowers and hope for the best; air pockets will form underneath the petals, creating unsightly white spots or even causing the flower to float away during curing.
Step 1: Creating the Base
Start by mixing your first batch of resin. This is where you introduce your background color. Tess Lark suggests using alcohol ink for a dramatic, marbled effect. Add a few drops of alcohol ink to your mixed resin and gently stir. Do not over-mix, or you will lose the beautiful, wispy patterns the ink creates. Pour this base layer into your mold. This layer should be thick enough to support the weight of the flowers but thin enough to cure quickly—usually about 1/8th to 1/4 inch deep.
Step 2: Positioning the Flora
While the base layer is still tacky, begin placing your 3D resin flowers. Use tweezers for precision. Arrange them in a composition that feels natural yet balanced. Some artists prefer a scattered, wildflower look, while others opt for a symmetrical cluster. Remember that the resin will fill in around the flowers, so leave some negative space if you want to see the underlying color pattern peeking through.
Step 3: The Second Pour and Sealing
Once your flowers are positioned, mix your second batch of resin. This time, consider adding mica powder for a soft, glowing undertone. Before pouring, take a heat gun and pass it quickly over the flowers and the base layer. This crucial step helps pop any trapped air bubbles beneath the petals. Then, slowly pour the second layer of resin over the arrangement. Pour from a height to help the resin flow into the crevices of the flowers.
If the resin level is not quite high enough to cover the tallest parts of the flowers completely, you may need a third, very thin pour. The goal is to encapsulate the flowers entirely, sealing them in a dome of clarity.
Adding Sparkle and Depth
What truly sets professional-grade trays apart is the use of additional textural elements. In Tess Lark’s classes, she demonstrates how to incorporate glitter and mica powder strategically.
Glitter adds a festive, eye-catching element. However, caution is advised. Too much glitter can make the resin cloudy or difficult to demold. Sprinkle it sparingly onto the wet resin, focusing on areas around the flowers to draw the eye toward the focal points. Fine silver or gold glitter pairs beautifully with neutral resins, while iridescent flakes can enhance colorful alcohol ink backgrounds.
Mica powder offers a different kind of luxury. By swirling a tiny amount of mica into the top layer of resin, you can create a subtle sheen that changes appearance depending on the lighting. This technique requires a light hand; a little goes a long way. The result is a tray that looks like polished stone or ocean glass, rather than plastic.
Common Pitfalls and How to Avoid Them
Even experienced artists encounter issues when making an epoxy tray with 3D resin flowers. Being aware of common mistakes can save you hours of frustration.
- Bubbles Under Petals: As mentioned, always use a heat gun before the final pour. If bubbles persist, use a toothpick to gently nudge them out, but be careful not to displace your flowers.
- Dust Contamination: Resin is sticky and attracts dust. Work in a clean, draft-free environment. Cover your project with a box or tent while it cures to ensure a flawless surface.
- Uneven Curing: Ensure your workspace temperature is stable. Extreme cold can prevent resin from hardening properly, while extreme heat can cause it to cure too quickly, trapping heat and potentially cracking the piece.
- Sticky Spots: If your tray feels tacky after demolding, you may have measured your resin incorrectly. Always use a scale, not volume measurements, for accuracy.
Care and Maintenance of Your Creation
Once your tray has cured for the recommended 24 to 72 hours, it is ready for use. However, resin is not indestructible. To maintain the brilliance of your 3D resin flowers and the clarity of the epoxy, avoid exposing the tray to direct sunlight for prolonged periods, as UV rays can cause yellowing over time. Clean the surface with a soft, damp cloth and mild soap. Avoid abrasive cleaners or scouring pads, which can scratch the glossy finish.
Embracing the Creative Process
The journey of making an epoxy tray with 3D resin flowers is as much about mindfulness as it is about craft. The slow drip of resin, the delicate placement of each petal, and the anticipation of the reveal create a meditative experience. Whether you are a hobbyist looking for a relaxing weekend project or an aspiring entrepreneur building a product line, this technique offers endless possibilities for customization.
Tess Lark’s approach encourages experimentation. Don’t be afraid to mix colors, try different flower arrangements, or play with the opacity of your layers. Every tray tells a story, and with practice, you will develop a unique style that is distinctly your own. So, mix your resin, gather your flowers, and start creating something beautiful today.