Flexi Seashell – Articulated 3D Print
Bringing a touch of the ocean to your workspace is easier than you might think, especially when you choose the Flexi Seashell – Articulated 3D Print. This isn’t just another static figurine sitting on a shelf; it is a functional, interactive piece designed to engage both the printer and the user. For hobbyists, educators, and professionals alike, this model offers a satisfying blend of aesthetic appeal and mechanical fun. However, achieving that perfect "snap" and smooth articulation requires more than just hitting the print button. It demands an understanding of how flexible models behave under stress and how slicer settings influence structural integrity.
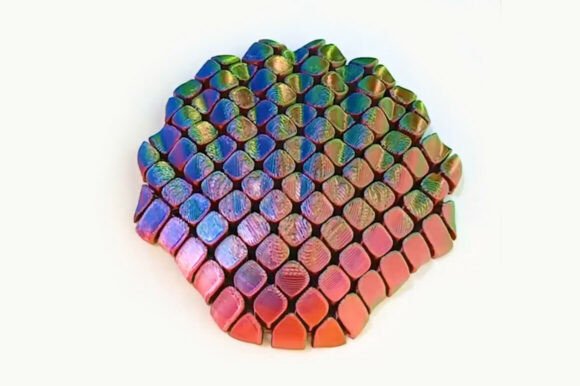
The primary allure of the Flexi Seashell lies in its print-in-place design. Unlike traditional models that require hours of post-processing—cutting away supports, sanding rough edges, and gluing separate parts together—this articulated sea treasure is ready to enjoy straight off the build plate. Its joints are printed as a single continuous unit, relying on precise clearance gaps to allow movement. This makes it an excellent project for beginners looking to experience the magic of 3D printing without the frustration of assembly, while also serving as a delightful fidget toy or decorative accent for seasoned enthusiasts.
Why Choose a Print-in-Place Design?
One of the most common misconceptions among new 3D printers is that all articulated models require some level of manual intervention. While some complex mechanisms do need careful alignment after printing, the Flexi Seashell – Articulated 3D Printable Ocean Model eliminates this barrier entirely. The design utilizes internal hinges that are formed during the printing process itself. When the printer finishes, these joints are slightly fused but remain mobile enough to flex immediately.
This approach saves time and reduces material waste. You do not need to spend extra filament on support structures, nor do you risk damaging delicate parts by removing them incorrectly. Furthermore, because no assembly is required, there is zero risk of losing small components or misaligning joints over time. For office environments or classrooms, this means a durable, low-maintenance decoration that can withstand regular handling. It transforms a simple seashell into a dynamic object that invites interaction, making it a perfect conversation starter or a tool for stress relief during long work sessions.
Common Pitfalls in Printing Flexible Models
Despite its simplicity, the Flexi Seashell is not immune to printing errors. Many users encounter issues where the joints are too tight to move or, worse, break off entirely. These problems usually stem from a misunderstanding of how layer adhesion and nozzle temperature affect flexible geometries. If the first layer is not properly adhered, the entire structure can detach from the bed, ruining the print. Conversely, if the extrusion rate is too high, the plastic will bulge into the hinge gaps, locking the mechanism in place.
Another frequent mistake involves ignoring cooling requirements. PLA, the recommended material for this model, relies heavily on rapid cooling to maintain sharp details and prevent stringing. Without adequate airflow, the thin walls of the shell may warp or become soft, compromising the structural rigidity needed for the articulation to feel satisfying rather than floppy. Additionally, assuming that any PLA will work equally well can lead to disappointment. Lower-quality filaments often have inconsistent diameters, which causes under-extrusion or over-extrusion, directly impacting the precision of the print-in-place joints.
Optimizing Your Print Settings for Success
To ensure your Flexi Seashell – Articulated 3D Print turns out perfectly, you must adhere to specific parameters that prioritize precision and adhesion. The goal is to create clean, consistent layers with minimal gap between the moving parts. Below are the critical settings to consider, along with the reasoning behind each choice.
- Nozzle and Temperature: Use a standard 0.4 mm nozzle. Set your nozzle temperature to 220 °C for both the first layer and subsequent layers. This temperature ensures good flow without excessive oozing, which could fuse the hinges. A lower temperature might result in poor layer bonding, while a higher one could cause the plastic to expand into the joint spaces.
- Layer Height: Opt for a fine layer height of 0.16 mm using a high-quality preset. Thinner layers reduce the chance of vertical ridges forming in the hinge areas, allowing for smoother movement. This setting also enhances the surface finish, making the seashell look more realistic and polished.
- Bed Adhesion: Set the bed temperature to 65 °C. Using a textured PEI plate is highly preferred, as it provides excellent grip for the first layer. Strong bed adhesion is non-negotiable for tall, slender objects like shells, preventing warping or detachment during the print.
- Speed and Travel: Keep outer wall speeds around 60 mm/s to ensure accuracy. Increase travel speed to 200 mm/s to minimize stringing across the open areas of the model. Slower travel speeds can cause excess filament to drip onto the print, potentially sticking the joints together.
- Infill and Structure: An infill density of 10% using a gyroid pattern is sufficient. Gyroid infill provides uniform strength in all directions without adding unnecessary weight. Ensure you set at least 3 perimeters (walls). This creates a thick, durable shell that resists cracking when bent repeatedly.
- Cooling and Retraction: Activate the cooling fan at 100% after the first few layers. This is crucial for maintaining the shape of the thin shell features. Set retraction to 0.8 mm at 30 mm/s to prevent blobs from forming on the exterior, which could interfere with the articulation.
By following these guidelines, you avoid the most common sources of failure. Remember, supports are not needed, so ensure your slicer software is configured to exclude them. This keeps the print clean and preserves the integrity of the underside of the shell.
Evaluating Your Results and Usage
Once the print is complete, take a moment to inspect the joints. They should move freely but retain enough resistance to feel substantial. If a joint feels stuck, do not force it. Instead, check for small strands of plastic (stringing) connecting the hinges and gently remove them with tweezers or a hobby knife. If the joint is too loose, it may be due to under-extrusion; in future prints, you might slightly increase the flow rate or adjust the wall count.
This model is versatile. For entrepreneurs and marketers, it serves as a memorable giveaway item that demonstrates attention to detail and creativity. Educators can use it to explain concepts of mechanics, such as leverage and friction, in a tangible way. Hobbyists will appreciate the challenge of mastering the slice settings to achieve that perfect balance of flexibility and durability. Whether used as a desk accessory to combat stress or as a centerpiece for an ocean-themed display, the Flexi Seashell delivers value through its interactivity.
Before purchasing or downloading the file, verify that your printer’s build volume accommodates the model’s dimensions. Also, ensure you have a reliable spool of PLA filament. Investing in quality materials pays off in the longevity of the print. A well-printed Flexi Seashell is not just a temporary novelty; it is a robust object that can withstand daily use. By avoiding common pitfalls and respecting the technical requirements, you transform a digital file into a tactile, joyful experience. Embrace the process, tweak your settings if necessary, and enjoy bringing this piece of the ocean to life on your desktop.