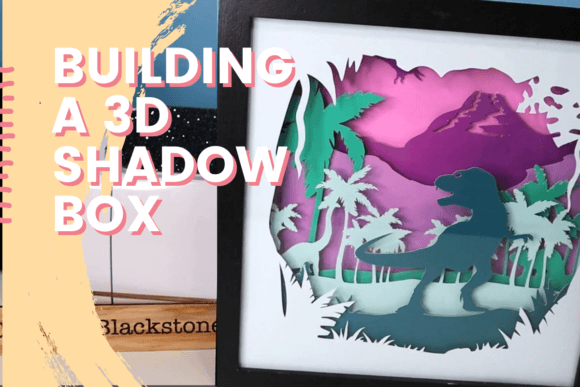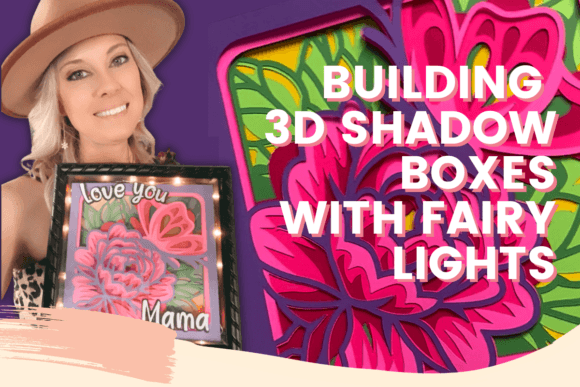
Building 3D Shadow Boxes with Fairy Lights
If you love crafting and creating as much as I do, you will absolutely love this 3D paper Shadow Box. It is one of those projects that sits perfectly at the intersection of art, light design, and heartfelt gifting. You can complete this shadow box in just a few hours, and it makes the perfect gift for any occasion. Let’s get creative.
At its core, Building 3D Shadow Boxes with Fairy Lights is an immersive craft project that transforms flat materials into layered, dimensional scenes illuminated by soft LED glows. Unlike traditional shadow boxes that rely solely on natural light or external room lighting, these creations use tiny battery-operated fairy lights to create depth, mood, and atmosphere. The result is a glowing piece of art that feels alive, whether it is displayed on a shelf, hung on a wall, or placed on a bedside table.
Why This Craft Captivates Creators
The appeal of this project lies in its accessibility and its dramatic visual payoff. Many people assume that creating three-dimensional art requires advanced sculpting skills or expensive equipment. However, building a 3D shadow box primarily relies on layering techniques using cardstock, foam board, acetate, and translucent paper. The addition of fairy lights adds a magical quality that elevates simple shapes into something enchanting.
This hobby supports several personal goals:
- Creative Expression: It allows you to visualize memories, dreams, or abstract concepts in physical form.
- Stress Relief: The repetitive nature of cutting, layering, and arranging elements provides a meditative experience.
- Personalization: Every box is unique because it reflects your specific taste, color palette, and storytelling preferences.
For beginners, the learning curve is gentle. You do not need to be a professional artist to start. In fact, the charm of these boxes often comes from their handmade imperfections. For experienced crafters, it offers a new medium to experiment with lighting effects, negative space, and material textures.
Understanding the Components
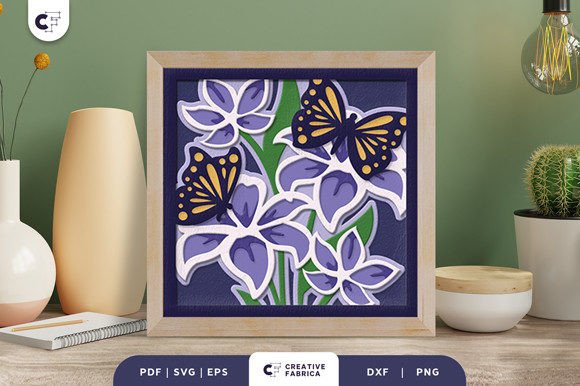
To successfully engage in Building 3D Shadow Boxes with Fairy Lights, it helps to understand the basic architecture of the project. A standard setup consists of four main layers: the background, the middle ground, the foreground, and the glass or acrylic front.
The background sets the tone. This might be a painted canvas, a piece of patterned wallpaper, or even a printed image. It is crucial that this layer is dark or richly colored if you want the fairy lights to pop, as bright white backgrounds can wash out the glow.
The middle and foreground layers are where the 3D effect happens. By cutting silhouettes or detailed shapes from cardstock and spacing them apart using spacers (such as strips of foam tape or wooden dowels), you create distinct planes of depth. When light passes through these layers, shadows fall onto the surfaces behind them, enhancing the illusion of space.
The fairy lights themselves are the heart of the project. While traditional incandescent bulbs generate heat and can be hazardous when enclosed in paper, modern LED string lights remain cool to the touch and consume very little power. Battery packs are preferred over plug-in options because they allow the box to be placed anywhere without worrying about cord management.
Practical Applications and Use Cases
One of the most compelling aspects of this craft is its versatility. You are not limited to making decorations for your own home. The process of Building 3D Shadow Boxes with Fairy Lights opens up numerous avenues for gifting, selling, and educational engagement.
Meaningful Personal Gifts
A handcrafted shadow box is a deeply personal gesture. Consider creating a "memory lane" box featuring miniature versions of places significant to your relationship, such as your first apartment, a favorite vacation spot, or a local park. Adding fairy lights mimics the stars above or the warmth of home, adding emotional resonance. These make exceptional gifts for weddings, anniversaries, graduations, or retirements.
Home Decor and Ambiance
In interior design, lighting is key. A 3D shadow box serves as a functional nightlight or an accent piece that adds texture to a room. Imagine a forest-themed box with glowing fireflies nestled among paper trees, or a celestial box with twinkling moons and planets. These pieces add a cozy, inviting atmosphere to bedrooms, nurseries, or reading nooks.
Educational Tools
Educators and parents can use this craft to teach spatial reasoning, geometry, and storytelling. Students can build dioramas of historical events, biological ecosystems, or literary scenes. The integration of lights helps demonstrate concepts like illumination, reflection, and perspective in a tangible way.
Small Business Opportunities
For entrepreneurs and freelancers, custom shadow boxes represent a viable niche product. Because each item is handmade, it carries high perceived value. You can offer customization services where clients provide photos or themes, which you then translate into layered paper art. Platforms like Etsy or local craft fairs are ideal venues for showcasing these unique items.
Important Considerations Before You Start
While the concept is straightforward, there are practical details to keep in mind to ensure your project succeeds.
Battery Life and Access: Since the lights are enclosed, changing batteries can be difficult. Opt for rechargeable AA or AAA batteries within the pack, or design your box with a removable back panel that allows easy access to the battery compartment. This is especially important if you plan to display the box long-term.
Heat Management: Even though LEDs are cool, always check the manufacturer’s specifications. Avoid placing the light source directly against thin paper or plastic, as prolonged exposure can cause discoloration or melting. Use diffusers like tracing paper or frosted acetate to soften the light and protect materials.
Layer Spacing: The distance between layers determines the sharpness of the shadows. Closer layers produce softer, more blended shadows, while wider spacing creates crisp, defined silhouettes. Experiment with different spacer thicknesses to find the look you prefer.
Material Quality: Use acid-free paper and cardstock if you intend to preserve the box for many years. This prevents yellowing and deterioration over time, ensuring that your creation remains vibrant and structurally sound.
Getting Started with Your First Project
If you are ready to begin, start small. Choose a simple theme, such as a single tree, a moon phase, or a geometric pattern. Gather your materials: a sturdy frame, cardstock in varying colors, a hot glue gun or double-sided tape, scissors or a craft knife, and a strand of warm-white fairy lights.
Sketch your design on paper first. Plan where each layer will sit and how the light will travel through the box. Remember, less is often more. Overcrowding the box can diminish the impact of the lighting and make assembly frustrating. As you gain confidence, you can introduce more complex elements, such as moving parts or multiple light sources.
The joy of Building 3D Shadow Boxes with Fairy Lights is not just in the final product, but in the process of bringing imagination to life. It is a slow, mindful activity that rewards patience and creativity. Whether you are doing it for relaxation, for connection, or for commerce, the glow of your creation will shine brightly. Welcome to a world where paper meets light, and ordinary moments become extraordinary displays of art.