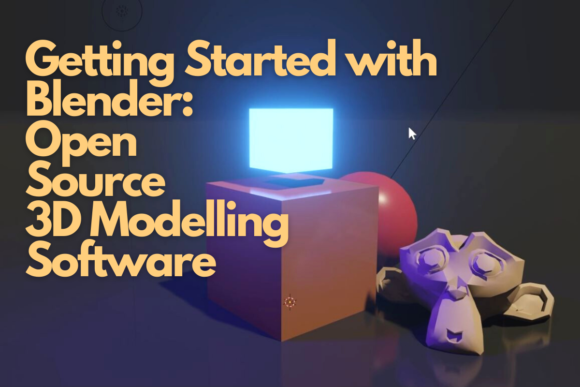
Getting Started with Blender Open Source 3D Modelling Software
Stepping into the world of 3D design can feel like being dropped into a cockpit without a manual. The interface is dense, the terminology is foreign, and the sheer number of tools available can be paralyzing for anyone new to digital sculpting or modeling. However, Getting Started with Blender Open Source 3D Modelling Software does not have to be an intimidating ordeal. In fact, it is one of the most rewarding skills you can acquire in today’s digital landscape, whether you are a marketer looking to create compelling product visuals, an educator designing interactive lessons, or a hobbyist eager to bring imaginative concepts to life.
The class led by experienced 3D designer Jose Vega offers a structured pathway through this complexity. Rather than throwing you into the deep end of advanced rendering engines or complex rigging systems, the curriculum focuses on the foundational pillars: workspace setup, navigation, and basic object creation. This approach is critical because many beginners skip these basics, assuming they can jump straight into making "cool stuff." This assumption often leads to frustration, inefficient workflows, and abandoned projects. By understanding the core mechanics first, you build a sturdy foundation that supports all future creativity.
Why Blender? Beyond the Free Price Tag
When people hear "open source," they often think of free software. While cost is undoubtedly a major advantage, focusing solely on the price tag misses the bigger picture. Blender has evolved into a professional-grade suite capable of handling everything from architectural visualization to full-length animated films. For small business owners and freelancers, this means access to enterprise-level capabilities without the recurring subscription fees associated with competitors like Maya or 3ds Max. This democratization of high-end tools allows entrepreneurs to produce high-quality content that previously required expensive studio budgets.
However, the open-source nature also means a constantly evolving ecosystem. Unlike proprietary software that may change its licensing model overnight, Blender’s community-driven development ensures transparency and rapid innovation. Yet, this comes with a learning curve. The interface is highly customizable but initially counterintuitive. Many users struggle not because the software is difficult, but because they try to apply logic from other programs—like Adobe Illustrator or Microsoft Word—to a 3D environment. Recognizing that Blender operates on a different paradigm is the first step toward proficiency.
Navigating the Interface: Avoiding Early Frustration
One of the most common mistakes beginners make is neglecting to set up their workspace properly. In Getting Started with Blender Open Source 3D Modelling Software, Jose Vega emphasizes that your workspace is your command center. A cluttered or default layout can hinder productivity and increase cognitive load. Before creating a single polygon, take the time to understand the various editors. The 3D Viewport is where you see and manipulate objects, but it works in tandem with the Properties panel, the Outliner, and the Timeline.
Understanding navigation is equally crucial. New users often fight against the mouse controls, leading to physical strain and confusion. Learning to orbit, pan, and zoom efficiently using specific key combinations (such as holding the middle mouse button) transforms the experience from a chore to a fluid interaction. If you find yourself clicking menus repeatedly to rotate your view, you are working against the software’s design. Mastering these shortcuts early saves hours of time and prevents repetitive stress injuries over long editing sessions.
Another overlooked detail is the importance of the viewport shading modes. Beginners often stay in "Wireframe" mode too long, trying to judge the form of an object without seeing its surface properties. Switching between Solid, Material Preview, and Rendered views helps you understand how lighting and materials will affect your final output. This visual feedback loop is essential for developing an eye for detail and composition.
Building Your First Objects: Precision Over Speed
Once the workspace is configured, the focus shifts to creating basic three-dimensional objects. It is tempting to download pre-made models from online repositories to get quick results, especially when under tight deadlines. While asset libraries are valuable resources, relying on them exclusively during the learning phase stifles growth. You cannot effectively modify or troubleshoot a model if you do not understand how it was constructed from primitive shapes.
In the class, you will learn to manipulate primitives—cubes, spheres, and cylinders—using fundamental tools like extrude, scale, and rotate. These operations seem simple, but they are the building blocks of all complex geometry. A common error here is ignoring the grid and origin points. Placing objects haphazardly in 3D space makes alignment difficult later. Always snap to grids, use axis locks (X, Y, Z), and keep track of your object’s local coordinates. This discipline ensures that your scenes remain organized and manageable, even as complexity increases.
Furthermore, pay attention to topology. Poorly arranged polygons can cause artifacts during animation or rendering. Even in basic modeling, aiming for clean edge flow and avoiding unnecessary vertices will save you significant troubleshooting time down the line. Jose Vega guides students through these nuances, ensuring that your first creations are not just visually presentable but structurally sound.
Setting Yourself Up for Long-Term Success
After completing the introductory modules, you should feel confident enough to experiment independently. However, true mastery requires consistent practice and a willingness to learn from mistakes. One effective strategy is to replicate existing designs. Try to model everyday objects around your home—a coffee mug, a chair, or a smartphone. This exercise forces you to confront real-world proportions and constraints that theoretical exercises ignore.
Additionally, engage with the Blender community. Since the software is open source, there are countless forums, tutorials, and Discord servers dedicated to helping users solve problems. Sharing your work and asking questions accelerates learning far more than solitary study. Remember that every expert was once a beginner who struggled with the same navigation issues and tool confusions you are facing now.
Finally, be patient with yourself. 3D modeling is a multidisciplinary skill that combines art, technical precision, and spatial reasoning. Progress may feel slow at times, but each small victory—successfully extruding a shape, applying a material, or exporting a render—builds confidence. By following the structured guidance of Getting Started with Blender Open Source 3D Modelling Software, you avoid the pitfalls that derail many aspiring artists. You gain not just a tool, but a new language for visual communication, opening doors to opportunities in marketing, education, entertainment, and personal expression.