Raincoat Pen Holder - Jacket Organizer STL 3D Model Easy 3D Printing
Adding a playful pop of color to your workspace is easier than you might think, especially when you leverage the versatility of 3D printing. The Raincoat Pen Holder - Jacket Organizer STL 3D Model offers a unique solution for desk organization that blends functionality with whimsical design. Inspired by the silhouette of a miniature rain jacket, this digital asset transforms standard office supplies into a charming focal point. Whether you are a teacher looking to brighten a classroom corner, a freelancer seeking inspiration in their home studio, or simply someone who appreciates well-designed stationery, this model provides a practical yet delightful way to keep pens, pencils, and small tools within reach.
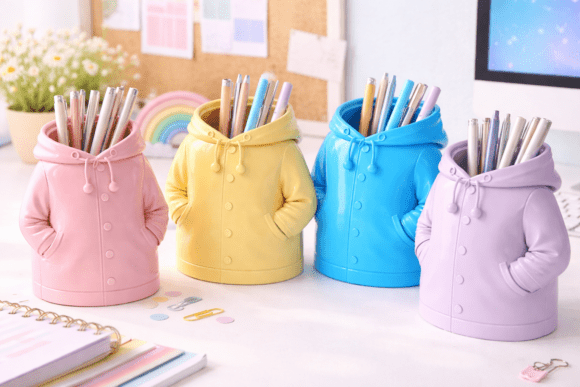
Unlike generic cylindrical cups, this organizer features distinct sculptural elements: a hooded top opening, detailed sleeves, front buttons, and attached drawstrings. These details create a realistic yet print-friendly finish that appeals to both beginners and seasoned makers. The design is optimized for multi-color printing, allowing users to experiment with pastel, bright, or neutral palettes to match their personal aesthetic or branding needs. However, achieving a high-quality result requires more than just hitting "print." Understanding the nuances of the geometry, material choices, and printer settings is crucial to avoiding common pitfalls that can ruin the final presentation.
Understanding the Geometry and Printability
One of the primary reasons creators choose this specific STL file is its balance between intricate detail and structural integrity. The smooth, slightly glossy surface finish intended by the designer relies heavily on clean mesh data and proper slicing parameters. A common mistake beginners make is underestimating the importance of wall thickness. If the layers are too thin, the delicate features like the hood’s rim or the individual buttons may become fragile and prone to snapping during post-processing or daily use.
To ensure stability, it is essential to verify that the base of the jacket is sufficiently wide and flat. While the design includes a stable base, some users attempt to scale the model down significantly to save filament. Scaling too far reduces the footprint, potentially causing the holder to tip over when heavy items like markers or scissors are placed inside. It is advisable to test different scale percentages in your slicer software before committing to a full print. Additionally, checking the manifold status of the STL file—ensuring there are no non-manifold edges or inverted normals—is a critical step that many overlook. A flawed mesh can lead to layer shifting, ghosting, or complete print failure, wasting both time and materials.
Material Selection for Durability and Aesthetics
The choice of filament plays a significant role in how the Raincoat Pen Holder looks and feels. Because the design aims for a modern, polished look, PLA (Polylactic Acid) is often the go-to material for its ease of use and vibrant color options. PLA prints at lower temperatures, which helps preserve fine details like the drawstring textures. However, PLA can be brittle. If this organizer will be used in a high-traffic area, such as a busy classroom or a shared office space, consider using PETG or ABS. These materials offer greater impact resistance and heat tolerance, ensuring the holder withstands accidental bumps without cracking.
For those interested in the multi-color aspect mentioned in the product description, careful planning is required. If you are using a single-extruder printer with a tool changer or manual filament swaps, you must account for purge towers and potential color contamination. Mixing dark colors with light pastels can result in muddy tones if the nozzle is not thoroughly purged. Alternatively, if you have a dual-extrusion setup, you can achieve cleaner color separation but need to manage support structures carefully to avoid visible artifacts on the outer shell. Always review the layer height settings; a finer layer height (e.g., 0.12mm or 0.16mm) will render the button details and sleeve folds much more sharply than a standard 0.20mm setting.
Avoiding Structural Failures and Support Issues
The hooded opening and the overhanging sleeves present specific challenges regarding support structures. Without adequate support, these areas may sag or droop, ruining the crisp lines of the raincoat design. Conversely, using too much support can leave behind unsightly marks that require extensive sanding or filing. The ideal approach involves generating tree supports or organic supports in your slicing software. These structures branch out only where necessary, reducing material usage and making removal easier while preserving the surface quality of the hood and sleeves.
Another frequent error is ignoring the orientation of the model on the build plate. Printing the jacket upright, with the hood facing up, generally yields the best results for the main body but may require significant support for the underside of the hood. Some users find it beneficial to rotate the model 90 degrees so it lies on its side. This orientation can reduce the need for vertical supports but introduces the risk of warping on large flat surfaces. Experimenting with both orientations in a simulation view can help you decide which method minimizes post-processing work for your specific printer capabilities.
Post-Processing and Assembly Tips
Once the print is complete, the finishing touches determine the professional quality of the final piece. Remove supports gently using flush cutters and sand any rough edges with fine-grit sandpaper. For models printed with PLA, a quick pass with an acetone vapor bath (if applicable to your safety protocols) or a specialized smoothing spray can enhance the glossy finish, though caution is advised to prevent melting delicate details. If your design includes separate parts that snap together, test the fit before applying any adhesive. Mechanical interlocks should provide enough friction to hold the pieces together securely.
Consider the intended environment when selecting your final color scheme. For educational settings, durable, easy-to-clean materials are preferable, and brighter colors can help students locate their writing instruments quickly. In contrast, creative studios might benefit from matte finishes and muted tones to maintain a sophisticated ambiance. Remember that this is a digital file; you are responsible for sourcing the materials and executing the print. Proper calibration of your printer’s bed leveling and extruder steps ensures consistent layer adhesion, which is vital for the longevity of the pen holder.
Who Is This Design Best Suited For?
This organizer is particularly effective for educators who want to introduce fun, thematic decor into their classrooms without sacrificing utility. It serves as an excellent conversation starter and can be part of a larger set of themed stationery. Freelancers and remote workers often struggle with visual clutter; adding a unique, colorful object to the desk can improve mood and focus. Furthermore, because the design is scalable, it adapts well to various storage needs. You can print multiple units in different sizes to organize everything from tiny styluses to thick highlighters.
Before downloading and printing, always review the license agreement associated with the STL file. Ensure you understand whether the design is intended for personal use only or if commercial distribution is permitted. Respecting intellectual property rights is a cornerstone of the maker community. By taking the time to prepare your files correctly, choose appropriate materials, and execute precise printing techniques, you can transform a simple digital download into a cherished, functional piece of art that enhances your workspace every day.