Creating 3D Printed Cookie Cutters
The intersection of digital design and traditional baking has never been more accessible. Creating 3D Printed Cookie Cutters represents a significant shift in how home bakers, professional pastry chefs, and creative entrepreneurs approach their craft. By moving away from mass-produced, generic shapes found in hardware stores, individuals can now leverage additive manufacturing to produce custom, precise, and highly personalized tools for their kitchen or business. This process is not merely about novelty; it is about reclaiming control over the aesthetic and functional aspects of food presentation.
In this class, we will be focusing on creating our own 3D-printed cookie cutters. The workflow involves translating a simple visual concept into a digital file, refining that design using computer tablet tools, and ultimately generating a physical object through 3D printing. You will need a 3D printing system of your choice for this class, whether it is an FDM (Fused Deposition Modeling) printer commonly found in maker spaces or a resin-based SLA printer for higher detail. The ability to design a simple PNG, convert it to an STL file, and prepare it for slicing is a valuable skill that extends far beyond the kitchen, offering practical applications in prototyping, education, and small-scale manufacturing.
The Design Workflow: From Pixel to Plastic
The journey of Creating 3D Printed Cookie Cutters begins long before the printer starts humming. It starts with the concept and the digital representation of that idea. For many users, the initial step involves sketching a design on paper or directly on a computer tablet. This digital sketch is typically saved as a PNG image. While PNGs are excellent for visual reference, they lack the three-dimensional data required for 3D printing. Therefore, the next critical phase is converting this 2D image into a 3D model, usually in the STL format.
Using computer tablet tools allows for precision that hand-drawing cannot match. You can adjust line thickness, ensure closed paths, and verify symmetry before the file ever reaches the slicer. This stage is crucial because errors in the digital model often result in failed prints or unusable cookie cutters. For instance, if the inner and outer boundaries of a cutter do not have sufficient separation, the resulting tool may be too fragile to withstand the pressure of cutting through dough. By mastering these digital tools, you gain the ability to iterate quickly, testing different variations of a sunflower design or a complex monogram until the geometry is perfect.
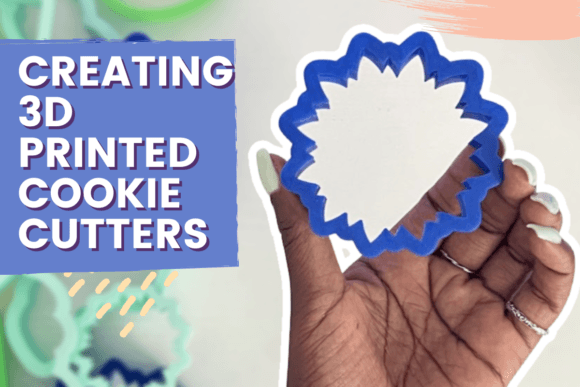
You can find the Sunflower design used in this class attached on the right-hand side, under the session titled Materials and Tools. Using a pre-existing design like the sunflower provides a safe starting point to understand the conversion process. However, the true value lies in adapting this knowledge to create original designs. Whether you are designing a logo for a bakery or a custom shape for a wedding, the ability to manipulate these files gives you unparalleled creative freedom.
Practical Benefits for Bakers and Creators
Why invest time in learning Creating 3D Printed Cookie Cutters? The benefits are tangible and extend across various professional and personal domains. For hobbyists, the primary advantage is customization. Standard cookie cutters often come in limited sizes and shapes. With 3D printing, you can scale any design to fit your specific needs. If you want a cookie cutter that fits perfectly onto a standard muffin tin, you can design one with exact dimensions. This level of control ensures consistency in your baking results, which is essential for those who enjoy presenting uniform treats.
For small business owners and entrepreneurs, Creating 3D Printed Cookie Cutters offers a low-cost entry into product differentiation. Imagine a boutique bakery that creates seasonal cookies shaped like local landmarks or holiday-specific icons. Instead of paying high minimum order quantities for custom metal stamps, you can print these tools on demand. This reduces inventory costs and allows for rapid response to trends. A marketer or blogger might use these cutters to create branded content, producing unique visual assets that stand out on social media platforms where visual appeal drives engagement.
Educators and parents also find immense value in this technology. The process serves as an excellent STEM (Science, Technology, Engineering, and Mathematics) activity. Children can learn about geometry, scaling, and digital fabrication while engaging in a fun, edible project. It bridges the gap between abstract digital concepts and tangible real-world objects, making learning more interactive and memorable. Furthermore, the durability of printed plastic cutters means they can withstand repeated use, unlike some flimsy metal alternatives that bend easily.
Technical Considerations and Limitations
While the potential is vast, it is important to approach Creating 3D Printed Cookie Cutters with realistic expectations regarding materials and safety. Not all 3D printing filaments are created equal. Standard PLA (Polylactic Acid) is popular due to its ease of use and low cost, but it is not inherently food-safe. Food safety concerns arise from two main factors: the material itself and the printing process. Most consumer-grade 3D printers extrude filament layer by layer, creating microscopic gaps between layers. These gaps can trap bacteria and dough residue, making thorough cleaning difficult and potentially hazardous.
To mitigate these risks, users should consider several strategies. First, apply a food-safe epoxy coating to the inside of the printed cutter. This seals the surface, creating a smooth, non-porous barrier that is easier to clean and safer for contact with food. Alternatively, some users choose to use the cutters only for fondant or gum paste work, which are less prone to bacterial growth than wet doughs, though caution is still advised. Another option is to print the cutter with a flexible material like TPU, which can sometimes be peeled away from the cookie more easily, reducing the risk of tearing delicate designs.
Additionally, structural integrity is a key consideration. Thin walls or intricate details may break during the cutting process, especially when working with stiff doughs. When designing your STL files, ensure that there is adequate support structure and that the cutting edge is thick enough to maintain strength. Testing prototypes with playdough or clay before using them with actual ingredients is a recommended practice. This allows you to identify weak points and refine the design without wasting expensive baking supplies.
Expanding Beyond the Kitchen
The skills acquired through Creating 3D Printed Cookie Cutters are transferable to numerous other fields. The ability to convert a PNG to an STL is a foundational skill in 3D modeling. Professionals in architecture, jewelry design, and industrial design can apply similar workflows to create prototypes and molds. For example, a jeweler might use a 3D printed cookie cutter design as a base for a wax mold, casting metal rings or pendants. The precision required for a cookie cutter translates directly to the precision needed for fine jewelry components.
Marketers and publishers can also benefit from this versatility. Custom-shaped packaging inserts, promotional items, or even unique bookends can be designed using the same principles. The democratization of design tools means that anyone with a tablet and a printer can become a manufacturer. This shifts the role of the consumer to that of a producer, fostering a deeper appreciation for the objects we use daily. It encourages a mindset of innovation and problem-solving, where limitations are seen as opportunities for creative solutions rather than barriers.
In conclusion, Creating 3D Printed Cookie Cutters is more than just a crafting tutorial; it is an introduction to the broader world of digital fabrication. By mastering the workflow from design to print, you unlock a new realm of possibilities for creativity, efficiency, and personalization. Whether you are enhancing your baking presentations, launching a small business, or simply exploring a new hobby, the skills you develop here will serve you well. Remember to prioritize safety, experiment with materials, and let your imagination guide your designs. The sunflower design provided in the materials section is just the beginning; the real masterpiece is the unique vision you bring to your creations.